I decided to keep pursuing designing my own backup pool HDD caddy, so I went ahead and decased (aka "shucked") one of my Seagate USB drives. It was a little tough to open, but with enough prying I succeeded. My first surprise what that the USB adapter extends beneath the drive - that's the coppery triangle PCB in the pic below:
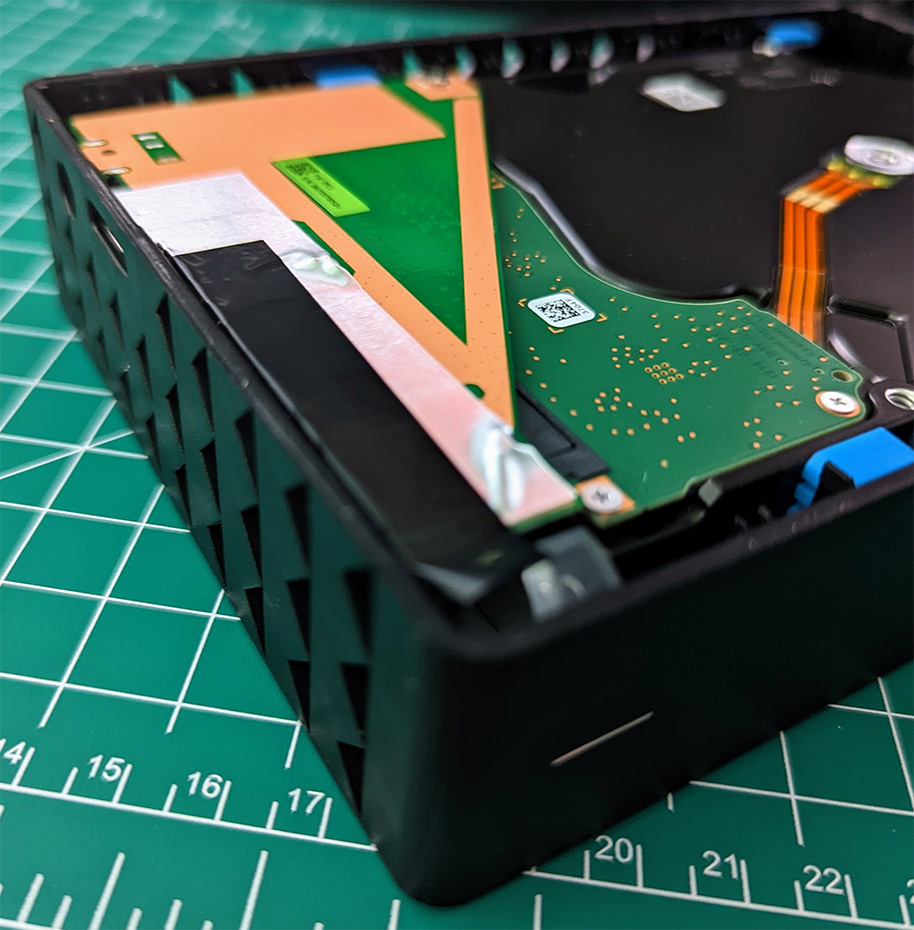
- Seagate HDD 1.jpg (218.64 KiB) Viewed 13059 times
It makes sense now that I see it, but I had been doing all my design work assuming the drive height was the standard 26.1mm, and this little board adds another 1.5mm of thickness. This solidified my choice to only do 7 drives with 7mm spacing between them, instead of 8 drives with 3.5mm of spacing, as that 3.5mm gap would get reduced to just 2mm because of this board. As-is, I don't actually have 7mm of spacing for air to flow, this adapter board reduces it to 5.5mm.
My second surprise is that the drive is an Exos Enterprise model, very similar to the 8TB drives I've been using recently in my Unraid server. I was expecting 5400RPM desktop class drives, amazingly these are 7200. I guess this explains the excessive heat output.
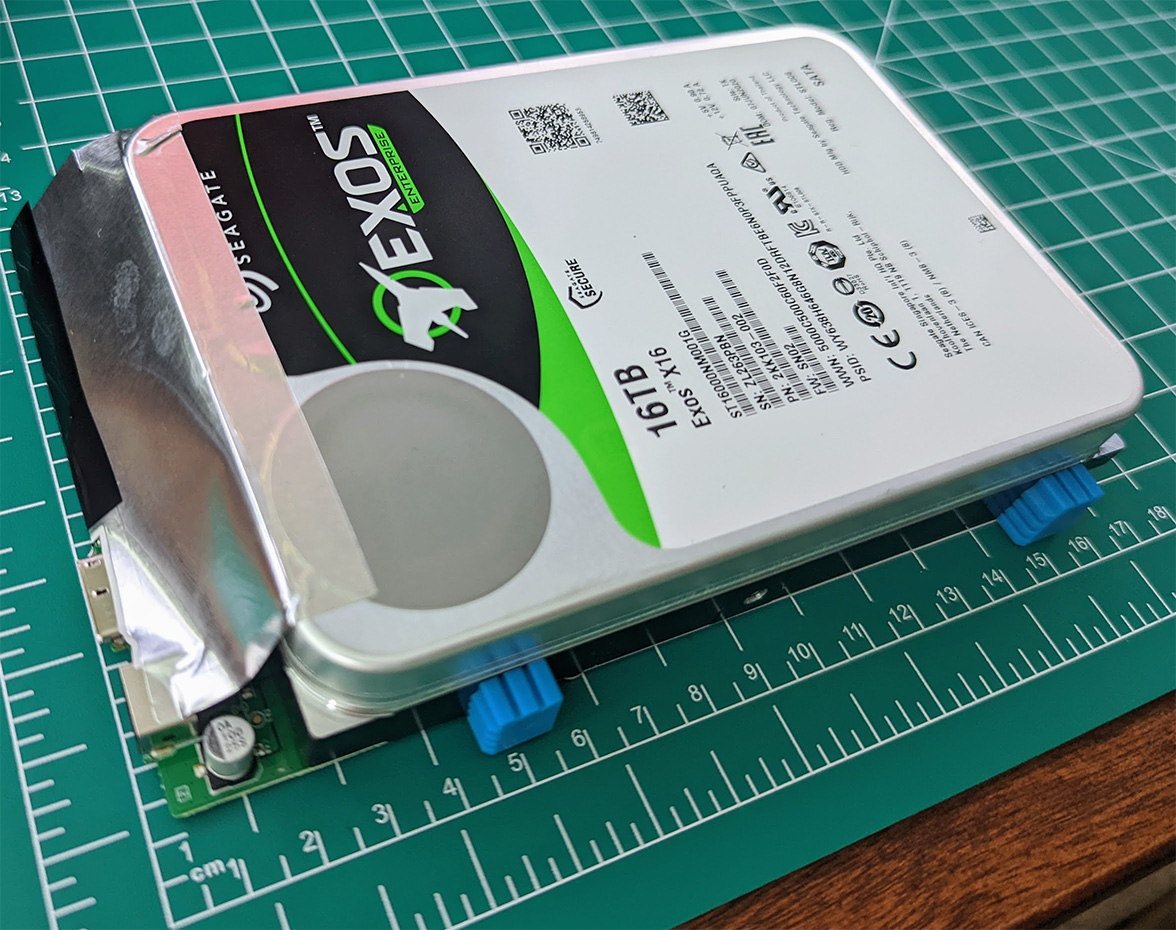
- Seagate HDD 2.jpg (360.98 KiB) Viewed 13059 times
Those little blue feet are the silicone-like mounting pads, which absorb some vibration, and the drive simply rests freely inside the enclosure. My caddy design doesn't permit using these, such a shame, because I need the securely mount the caddy panels to the drives in an exoskeleton style assembly. But none of my Unraid server's drives have vibration mounts, so I'm not too concerned about losing them here.
While trying to fit everything inside the caddy, some of the panels ended up growing in size. At one point, some of them were actually too big to print on my printer. So I had to resize a few parts to make it printable again. I also had to get a right-angle adapter for the power supply brick so that the power cord connects from the back, as there just wasn't enough room otherwise.
Here's a render of the current design, about 97% done. I'm actually thinking of printing in these colors, black and silver, as it looks spiffy to me in the render:
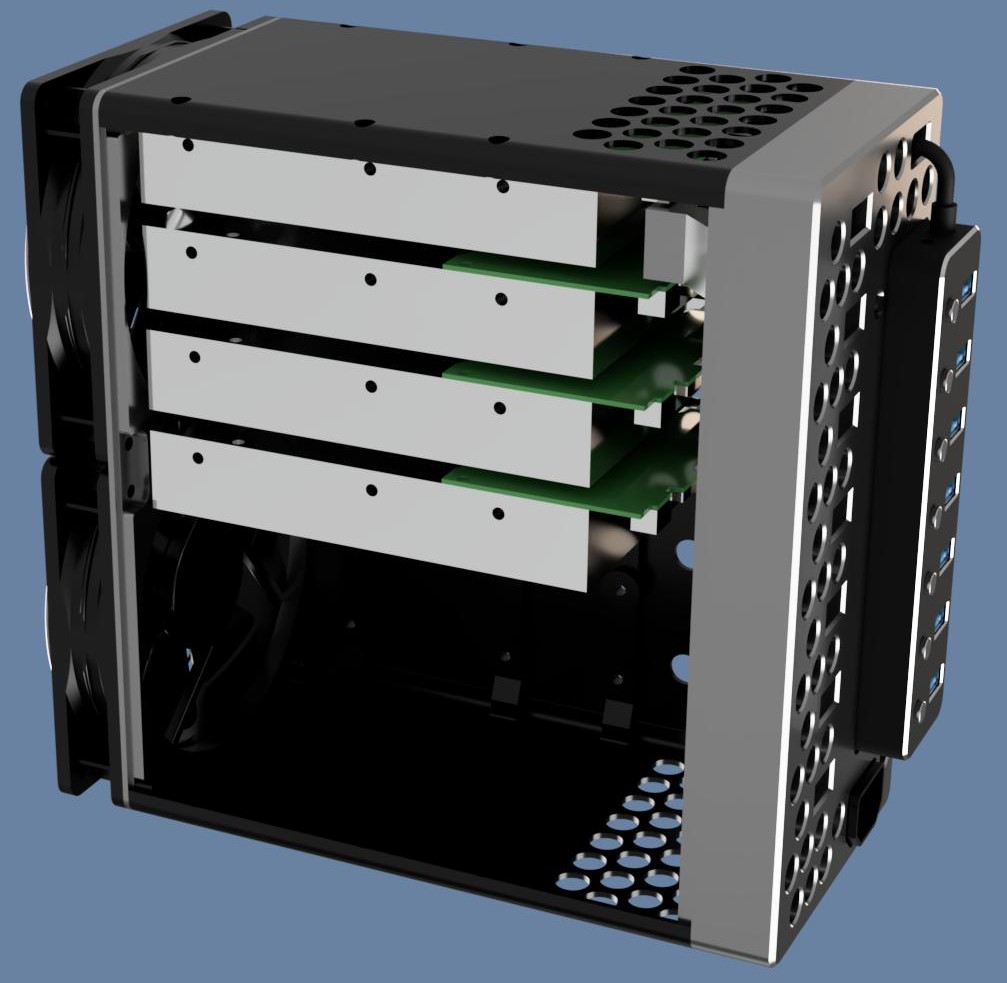
- 3.5_HDD_Caddy_Almost_Done.jpg (138.69 KiB) Viewed 13059 times
I calculated the open area of the two 120mm intake fans (18,260mm
2), and then added 181 little 11mm exhaust holes all over the opposite end of the case, on the top, bottom, both sides and the back. By adding up all the openings, and reducing for blockage, I figure that exhaust openings total the same 18,260mm
2, so exhaust shouldn't be a bottleneck.
Not sure that this matters, though, as I also added up the air passages around the drives, and that's only around 4,700mm
2, just 25% of the inlet/exhaust openings. I never did make it through fluid dynamics in college, and don't have the software needed to model the airflow behavior, but I think the air will speed up as it squeezes through the drives, then slow down again upon exit.
Regardless, this is significantly better than trying to blow air through the USB enclosures, as there is only about 600mm
2 worth of intake/exhaust openings on those little plastic boxes.
All that remains to be done on the design is to add a handle on top, and some screw mounts to connect the silver cover to the rest of the caddy.
I'm still not sure if I'm going to really attempt to print this - I typically have struggles printing near the max size of my printer's bed, and this is bigger than anything I've ever tried before. And it's not just 1 part that's big, it's all 6 sides, so it kinda feels like asking for trouble. I'll probably print at least one of the biggest sides just to see if it's even possible. If I have a guess, I'll probably end up abandoning this project, or at least postponing it until some point in the future when I get a bigger and better printer.
Even if I don't end up printing it, I've enjoyed a few days of design work, honing my CAD skills. I've been doing the design in Fusion 360, and I've learned a few new skills on this little project. I even modelled the 7-port USB hub in realistic detail just for practice - it was hard work but I really like the result. The extra detail did come in handy on a few parts, especially the HDD's when I added the USB connector - it was only then I realized I had the power supply on the wrong side blocking cable access.
